

With the rise of AI, we are seeing more and more use cases being made accessible through OpenAI's initiatives.
StableDiffusion, like Dall-E from OpenIA, is a machine-learning model for generating photorealistic digital images from natural language descriptions.
We'll learn how to use the DreamBooth to generate your own AI avatars with the Stable Diffusion text-to-image AI model.
You will need to use Google Colab to execute the Python code.
1 Prepare your photos
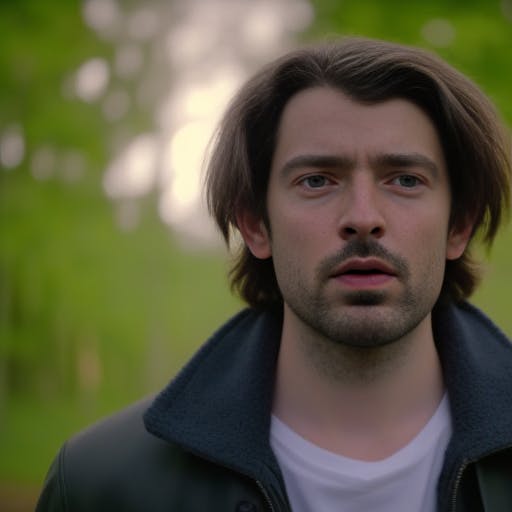
To get started, get 15-20 photos of you with different environments, positions, clothes, moods, hair, etc.
Then, crop each of them to 512x512 pixels. You can use this tool to crop photos easily.
Finally, rename the files with a unique keyword and a number e.g "hashim1.png" ,"hahsim2.png"
2 Configure Google Colab notebook
To start working with Colab you just need to log in to your Google account. Colab notebooks are stored in your Google Drive account and give you a complete environment to run your scripts.
Access the notebook by clicking on this link.
Make sure the settings are correct.
Go to Runtime > Change runtime type and check that GPU is enabled.
4 Configure StableDiffusion
You have to execute each script block in the order. To execute a script you have to select the script block and click on the play button in the top left corner of the block.
Start with the first block to connect your Google Drive. Set up the environment with the second block. Before running the third block, sign up on HuggingFace and get your API key in Profile > Settings > Access Token.
Copy/Paste it into the Huggingface_Token field and run the block.

This will download StableDiffusion 1.5. When you see DONE!, it's time to go to the next block.
⚠️ For the next steps, we will only use the new fast method, do not touch the old method block.
Set a unique session name you never used before and run the block.
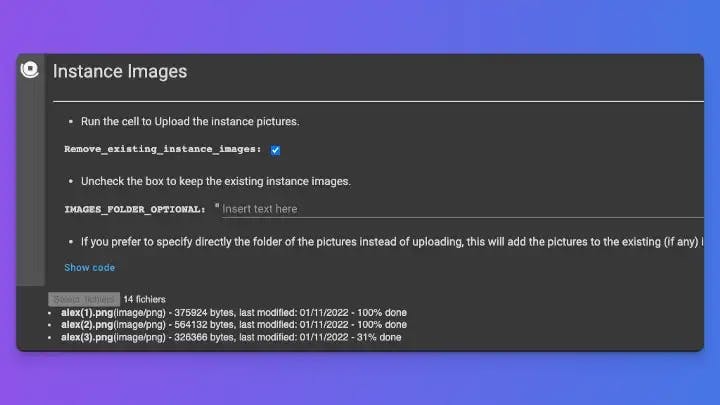
Now we will upload all our previously prepared photos.
Run the Instance Images block and select your photos.
5 Let’s train your model
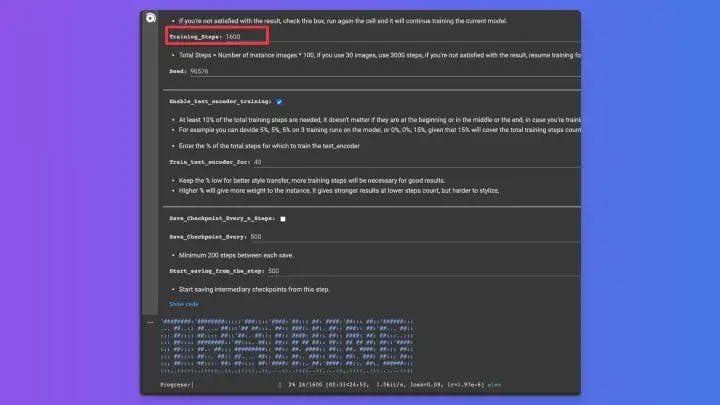
Now we will initiate the learning of our model.
Replace the Training_Steps with 1600 and run the block. This is the value with which I had the best results.
6 Generate your avatars
Finally, here we are at the most fun part!
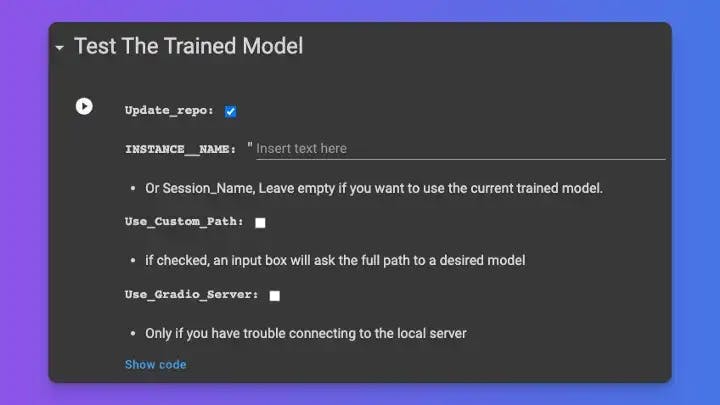
If you want to run a previous session, enter the session name in INSTANCE_NAME.
Leave it empty this time.
This will produce an URL in the output, click on the link and Done!

You can write your prompt with different combination of words and Press Generate and here we go!
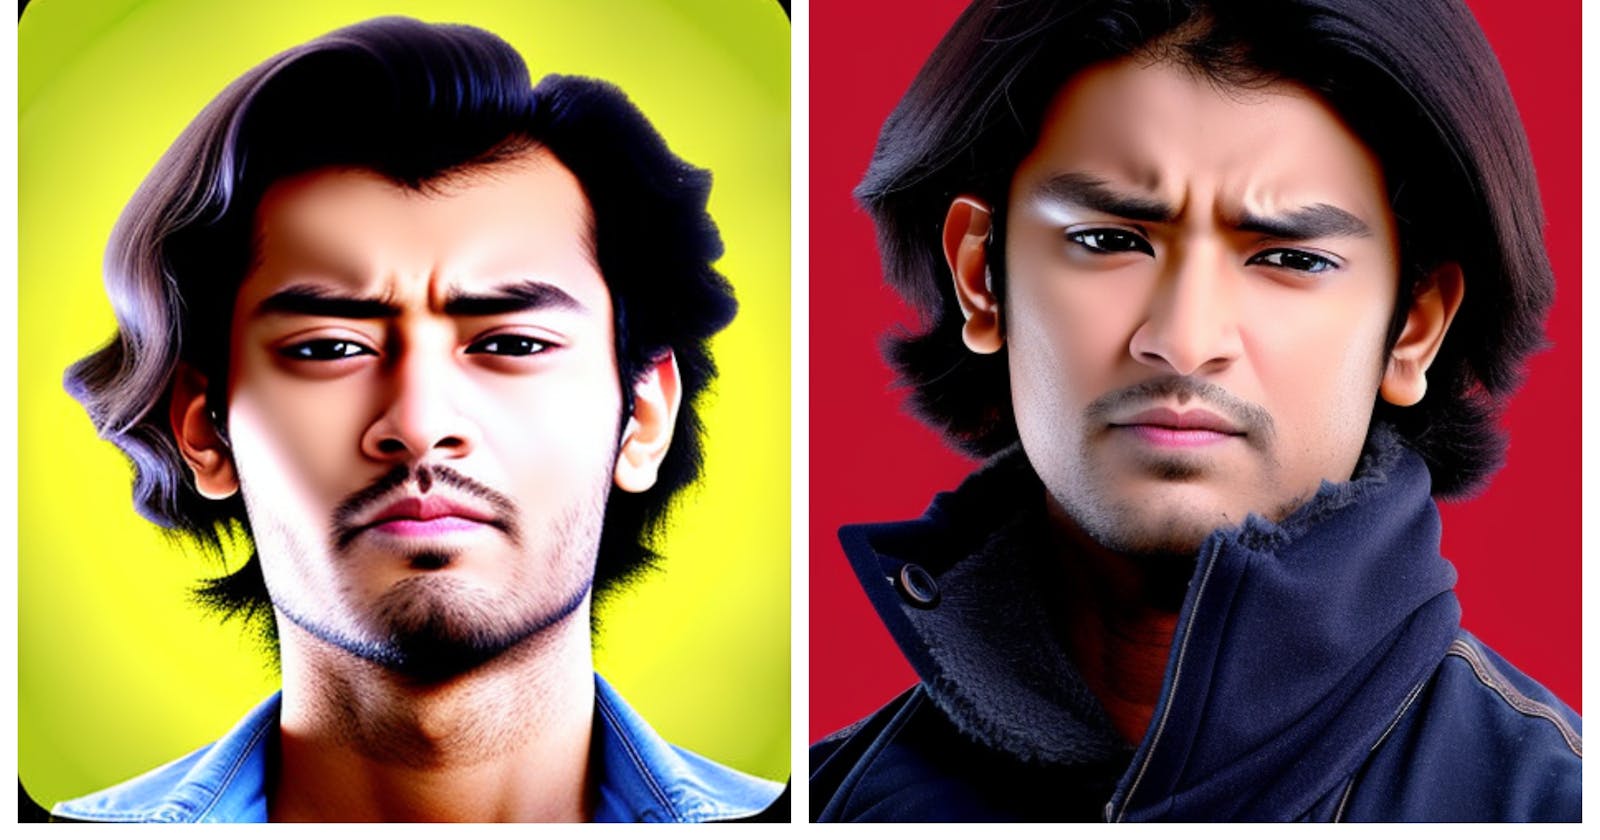
These are some results that I produced: